Gleitschirme


Reparaturen
Reparaturarbeiten, die von Laien durchgeführt werden, können mehr schaden als nützen. Lass größere Reparaturarbeiten an deinem Schirm immer von einem qualifizierten Fachbetrieb durchführen.
TUCH
Wenn dein Schirm in einem strukturrelevanten oder tragenden Bereich wie in der Nähe einer Naht oder einer Befestigungsschlaufe beschädigt ist, muss er von einem Fachbetrieb repariert werden – du kannst und sollst die Reparatur nicht selbst durchführen. Ist dein Schirm stark beschädigt und kann dein Fachbetrieb vor Ort die Reparatur nicht selbst durchführen, wende dich bitte an deinen Ozone Händler vor Ort – möglicherweise kann der Schirm in unserer Fabrik repariert werden kann.
Einfache Schnitte und Risse in nicht strukturrelevanten oder tragenden Bereichen wie inmitten einer Bahn kannst du jedoch ganz leicht selbst reparieren. Einen kleinen Riss kannst du mit dem Reparaturkit kleben, das gemeinsam mit deinem Schirm geliefert wird. Das weiße Klebesegel ist durchsichtig und eignet sich daher für alle Schirmfarben. Du kannst deinen Schirm entweder damit oder aber mit einem Spinnaker-Reparaturband reparieren, das du in allen möglichen Farben bei einem Schiffsausrüster oder im Internet bekommst.
Der Riss sollte für zusätzliche Festigkeit sowohl von oben als auch von unten mit Klebesegel repariert werden. Schneide zwei Patches aus dem Klebesegel aus, die den Riss großzügig abdecken. Um einem dicken, harten Rand vorzubeugen, lautet unsere Empfehlung, die beiden Patches nicht genau gleich groß zu machen. Den größeren Patch bringst du am besten auf der Innenseite des Segels an, da er dort weniger sichtbar ist. Runde die Ecken der Patches ab, da sich die Ecken sonst im Lauf der Zeit ablösen können.
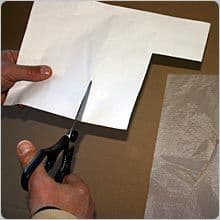
Schneide den Patch so aus, dass er den Riss großzügig abdeckt.
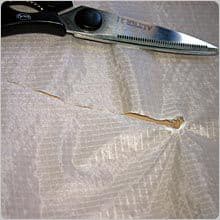
Das ist der Riss, den wir flicken wollen.

Schneide den Patch so aus, dass er den Riss großzügig abdeckt.
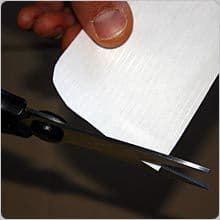
Runde die Ecken der Patches ab, sodass die Spannung gleichmäßig verteilt wird.
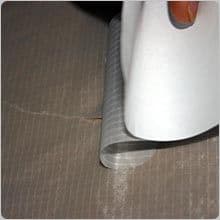
Straffe das Tuch auf beiden Seiten und bringe eine Seite des Patches sorgfältig auf dem Riss an.
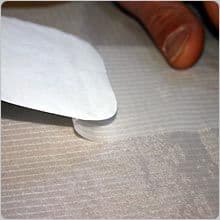
Ziehe das Abdeckpapier vom Patch ab und rolle diesen dabei ab, bis er vollständig auf dem Tuch klebt. Achte dabei darauf, dass keine Luftblasen eingeschlossen sind.
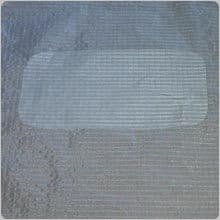
Die fertige Reparatur. Bei einem großen Riss wie diesem solltest du auf beiden Seiten Klebesegel anbringen.
LEINEN
Jegliche beschädigten Leinen sollten von einem Fachbetrieb ersetzt werden. Es ist wichtig, dass diese Ersatzleine aus demselben Material gemacht ist, gleich lang ist und dieselbe Stärke hat, wie die Originalleine. Vergleiche die Länge der neuen Leine mit ihrem Gegenstück auf der anderen Schirmseite und stelle sicher, dass die beiden symmetrisch sind. Nachdem die Leine ausgetauscht wurde, ziehe den Schirm vor dem Starten auf, um ihn zu überprüfen.
