Paragliders

Paragliders


Amateur repairs can do more harm than good. Always let a a qualified professional carry out major glider repairs.
If your wing is damaged in a structurally important area such as near a seam or near an attachment point it requires a professional repair, you cannot fix it yourself. If your wing is severely damaged and your local repair centre is unable to perform the repair, please contact your local Ozone dealer, it may be possible to have it repaired at the factory.
Simple rips and tears, in non-structural areas such as in the middle of a panel, can however be easily repaired at home. If the rip is small, you can fix it yourself, you’ll find all the materials necessary in the repair kit supplied with your wing. The white sticky-backed cloth is actually translucent and therefore suitable for all colours. The fabric can patched with this or with normal spinnaker repair tape available in a plethora of colours from a boat chandler or the internet.
Repair patches should be stuck to both surfaces of the tear for added strength. Cut out two patches big enough to allow ample overlap around the tear. The two patches should be slightly different in size to avoid a hard thick edge, it is recommended to have the larger patch on the inside as it will be less visible. Round off the corners of the patches, this will reduce the chances of a corner lifting over time.
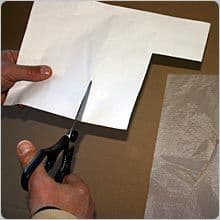
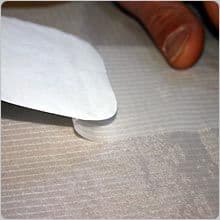
Cut the patch making sure we have plenty of overlap.
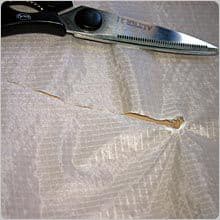
This is the rip we need to repair.
Cut the patch making sure we have plenty of overlap.
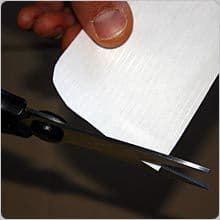
Round the corners of the patch to spread the tension.
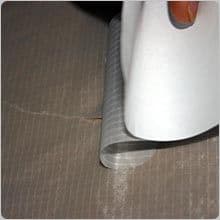
Carefully roll the patch onto the tear whilst holding the material either side taught. Carefully roll the patch onto the tear whilst holding the material either side taught.
Keep easing off the backing paper till the patch is completely stuck down, make sure there are no air bubbles.
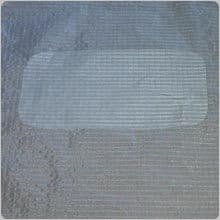
The finished repair. On a large tear like this you should stick a repair patch on both sides.
Any line that is damaged should be replaced by a qualified professional. It is important that the replacement line is made from the same material, has got the same strength and is the same length. You can check its length against its counterpart on the other side of the wing, to make sure that it is symmetrical. Once the line has been replaced, inflate and check the glider before flying.